

This guide shows you how to create a dedicated sub-account and fund it on Bitget. Before you start, make sure your Bitget account has KYC Level 1 completed and Google Authenticator enabled.
Why dedicated? Alpha Pro needs a space that only it uses. To keep the strategy working correctly, don't place manual trades or modify positions inside it once it's running.
Step 1 — Create a sub-account
- Visit the Bitget website and log in with your main account.
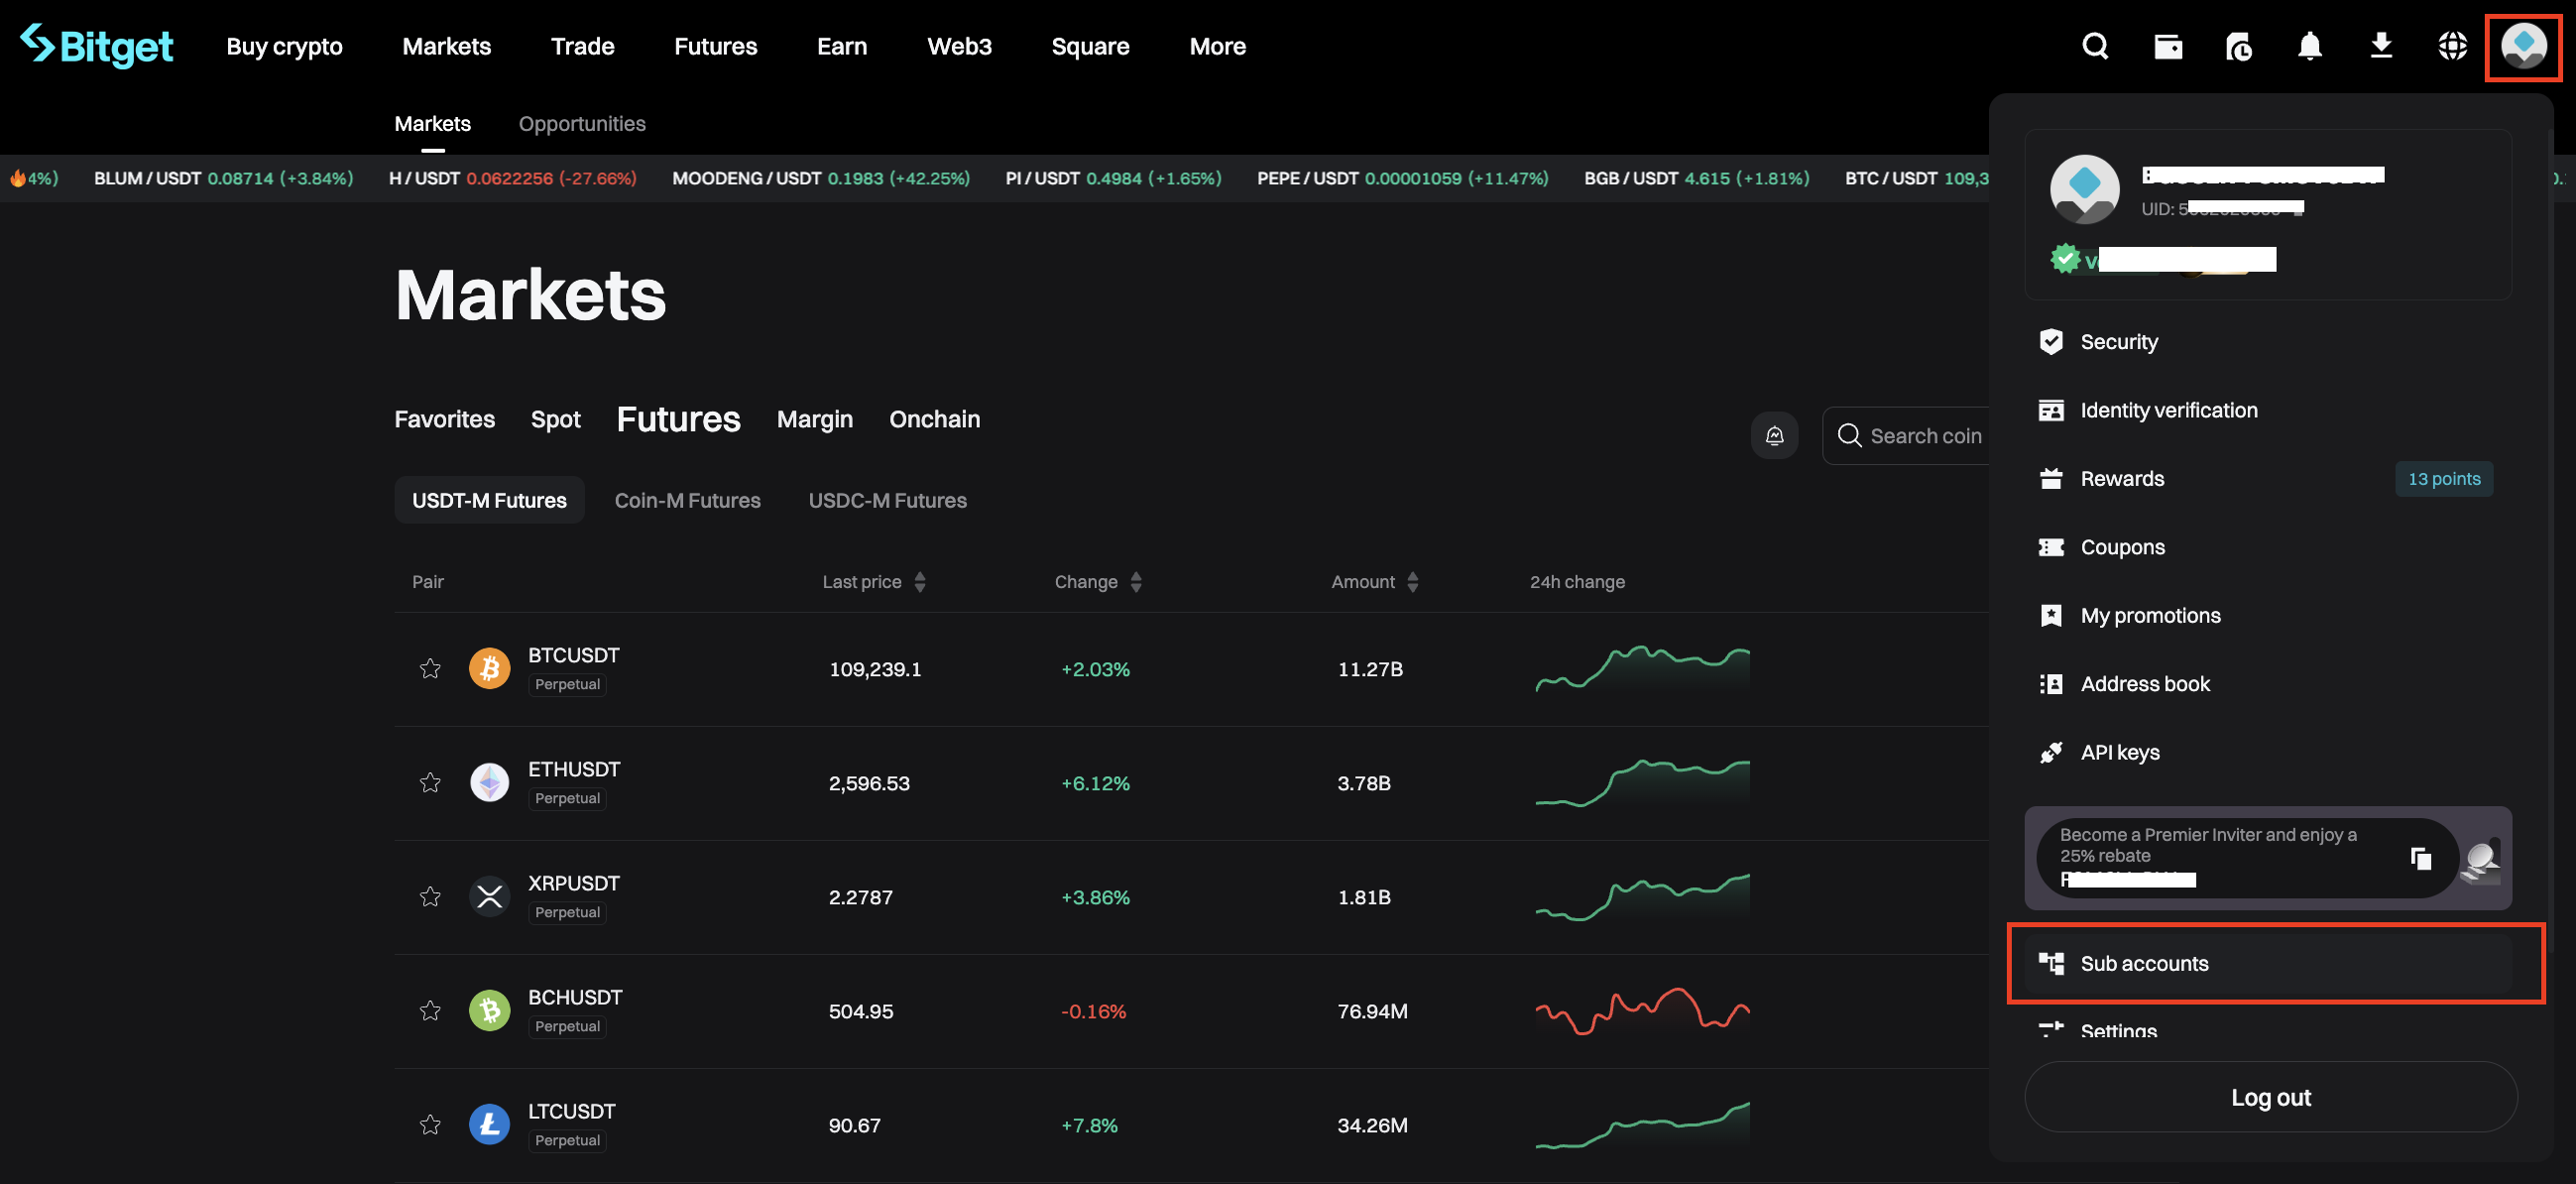
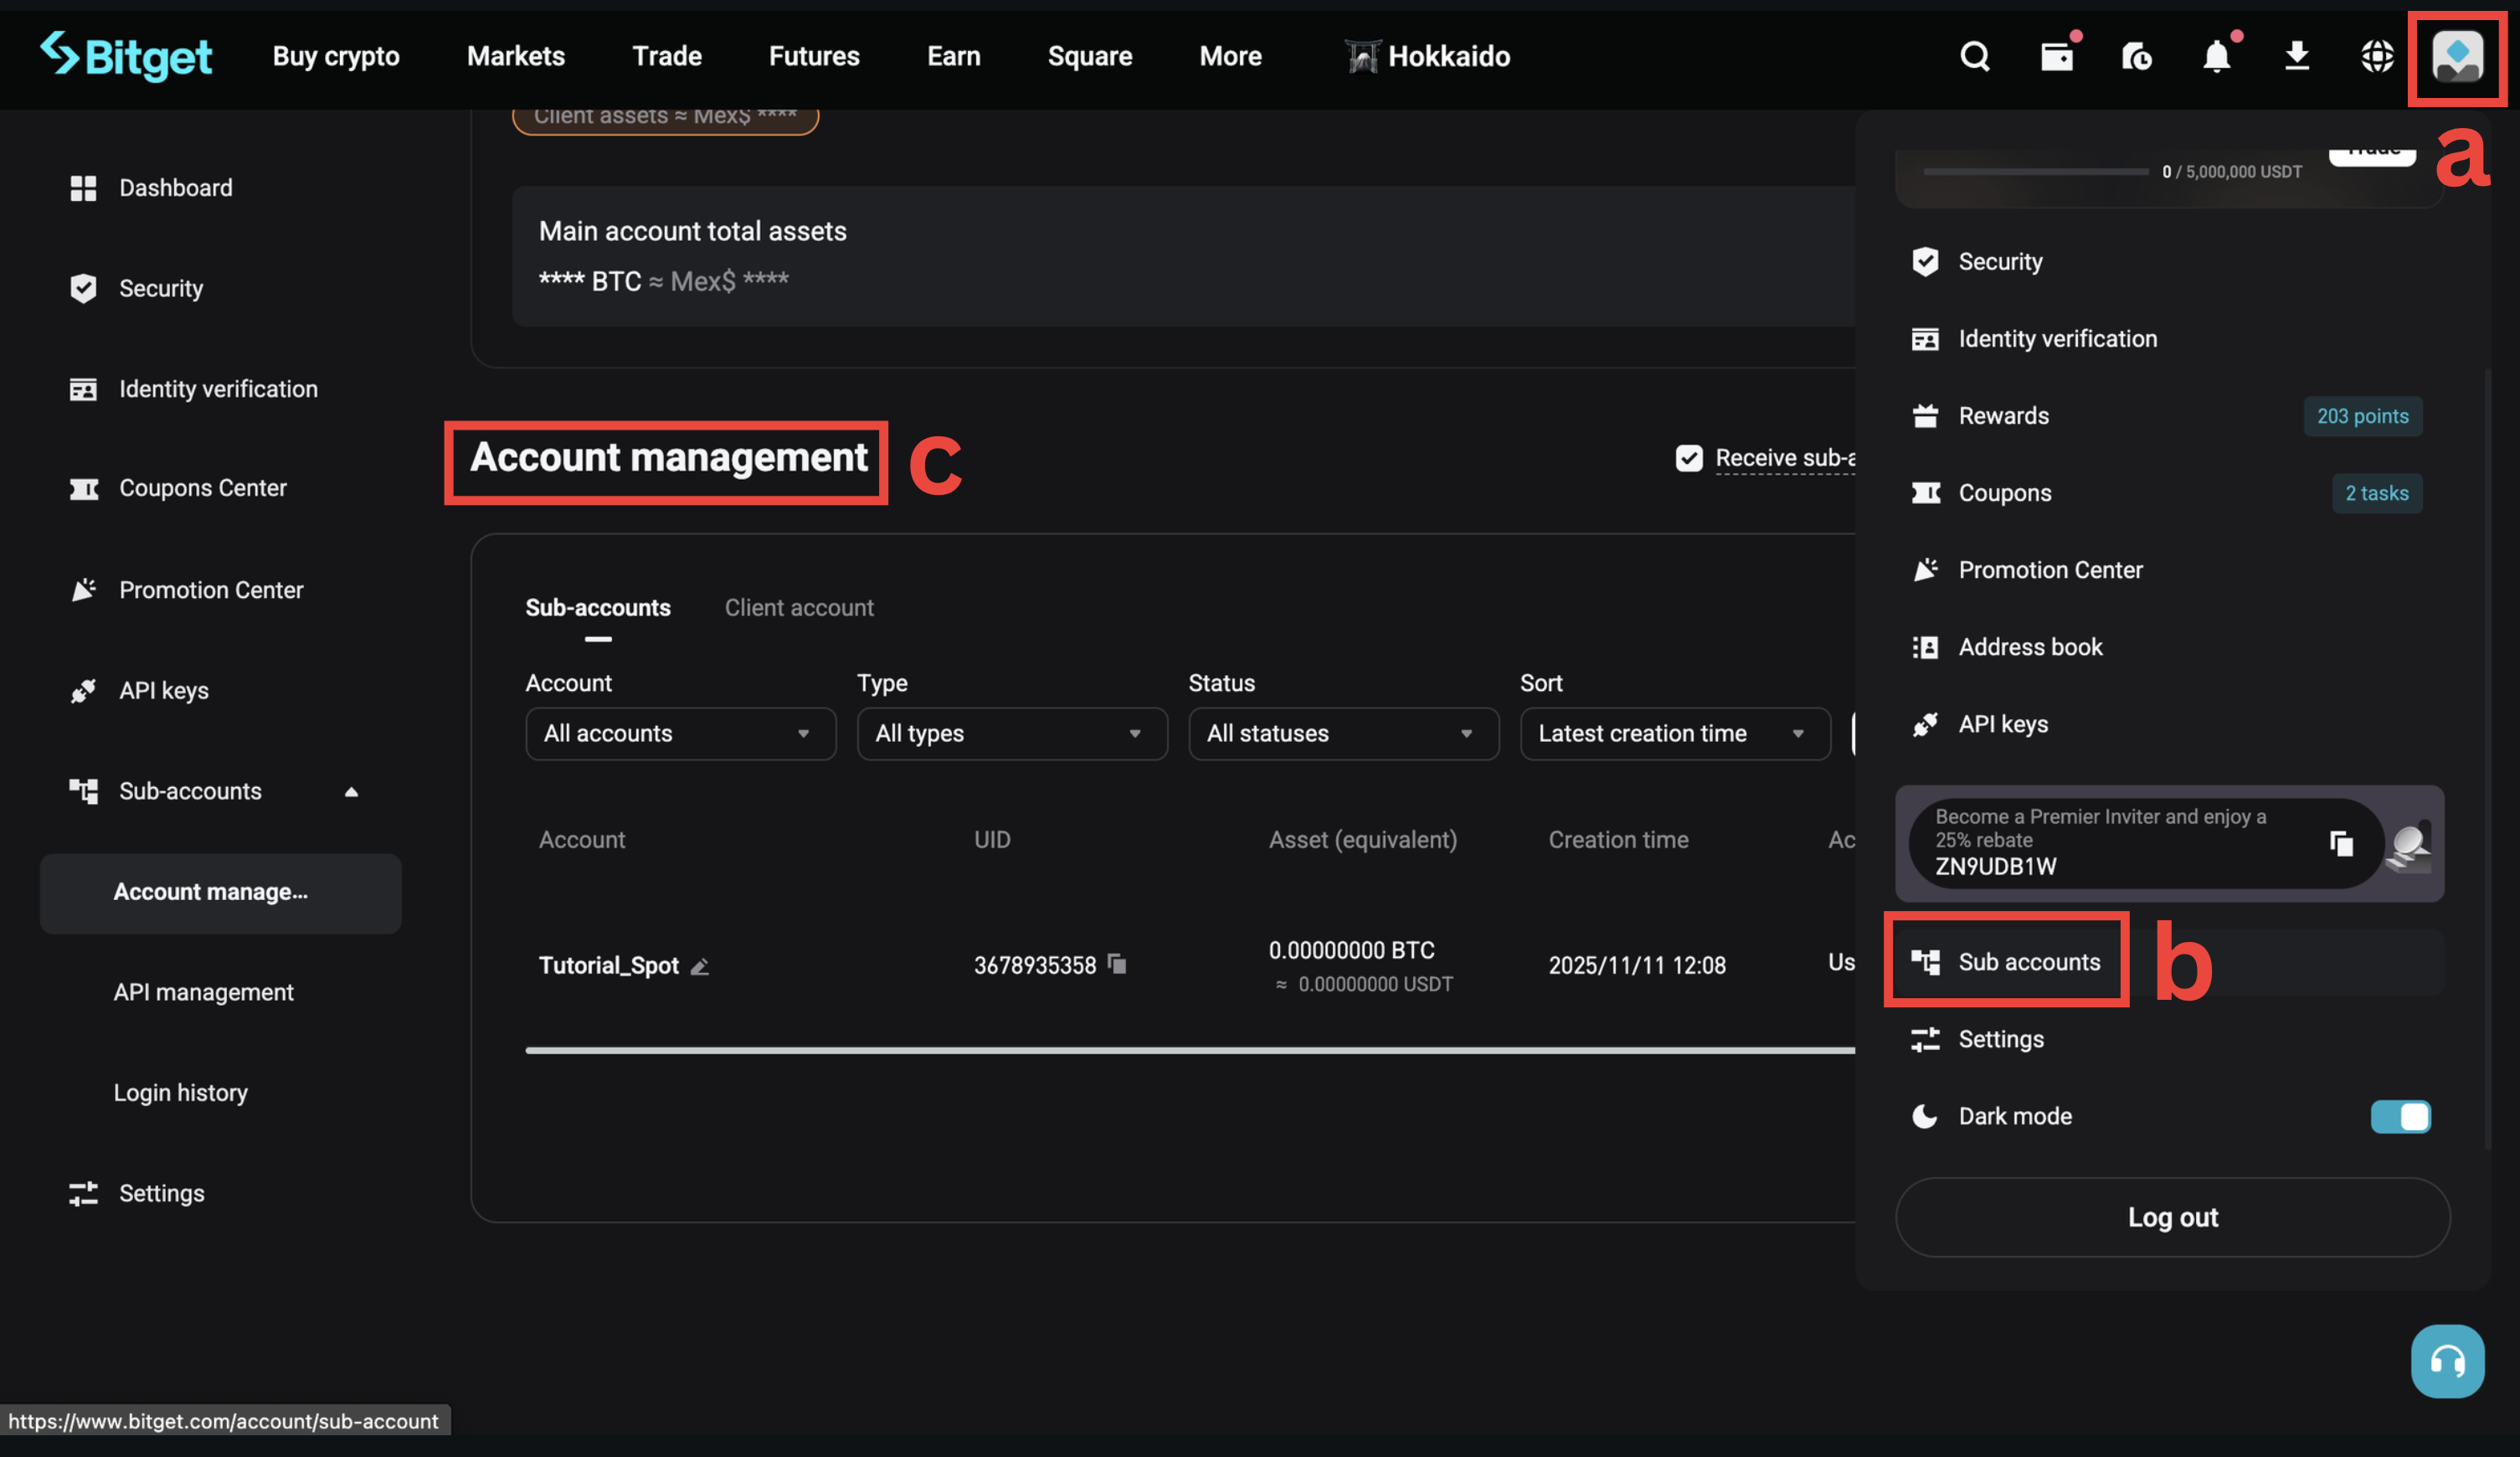
- Click your profile icon at the top of the homepage and select Sub-accounts from the dropdown.
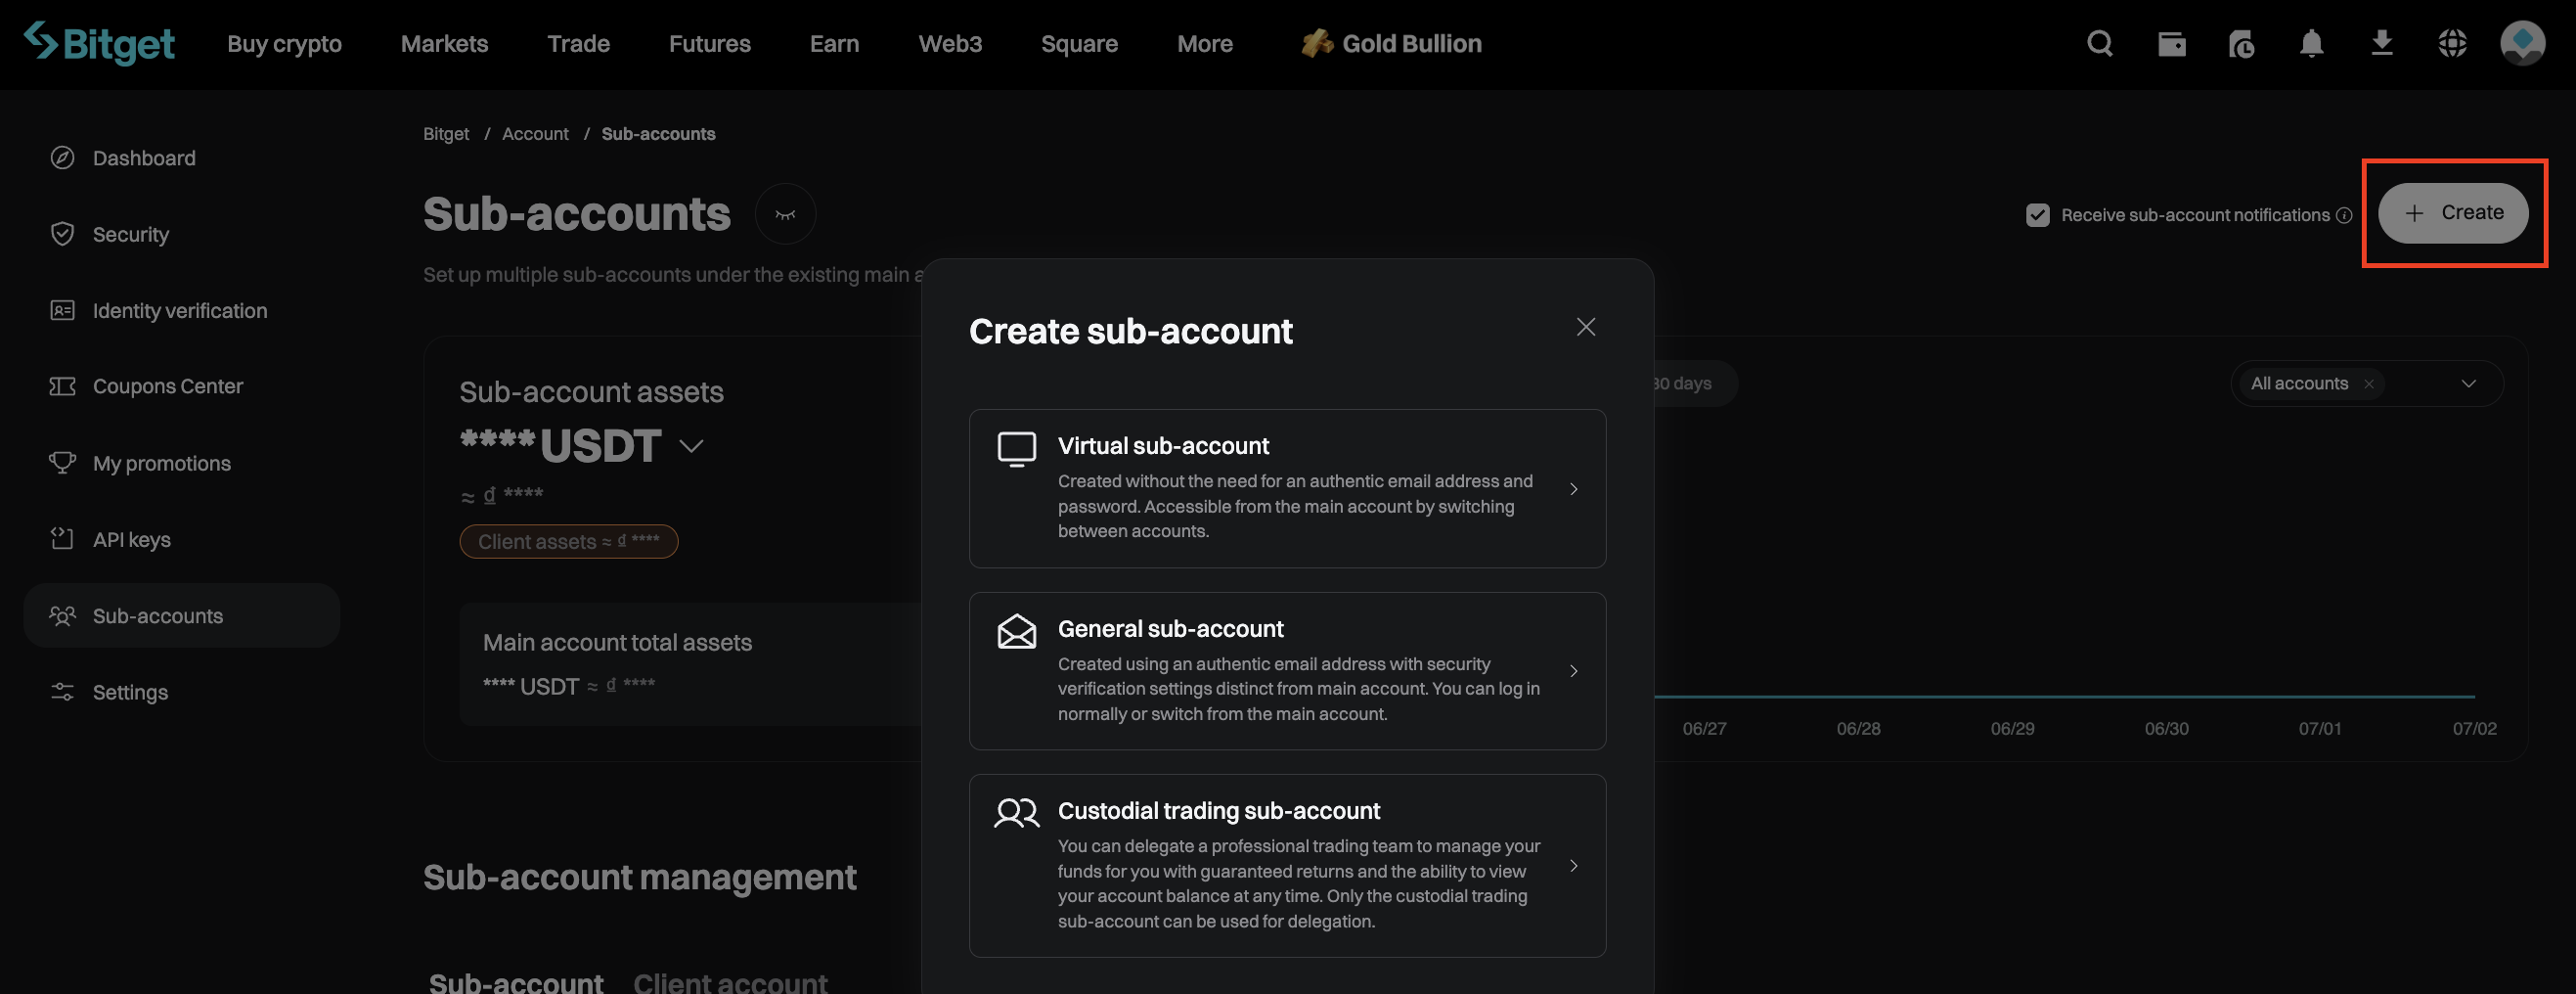
- On the sub-account page, click Create in the upper-right corner.
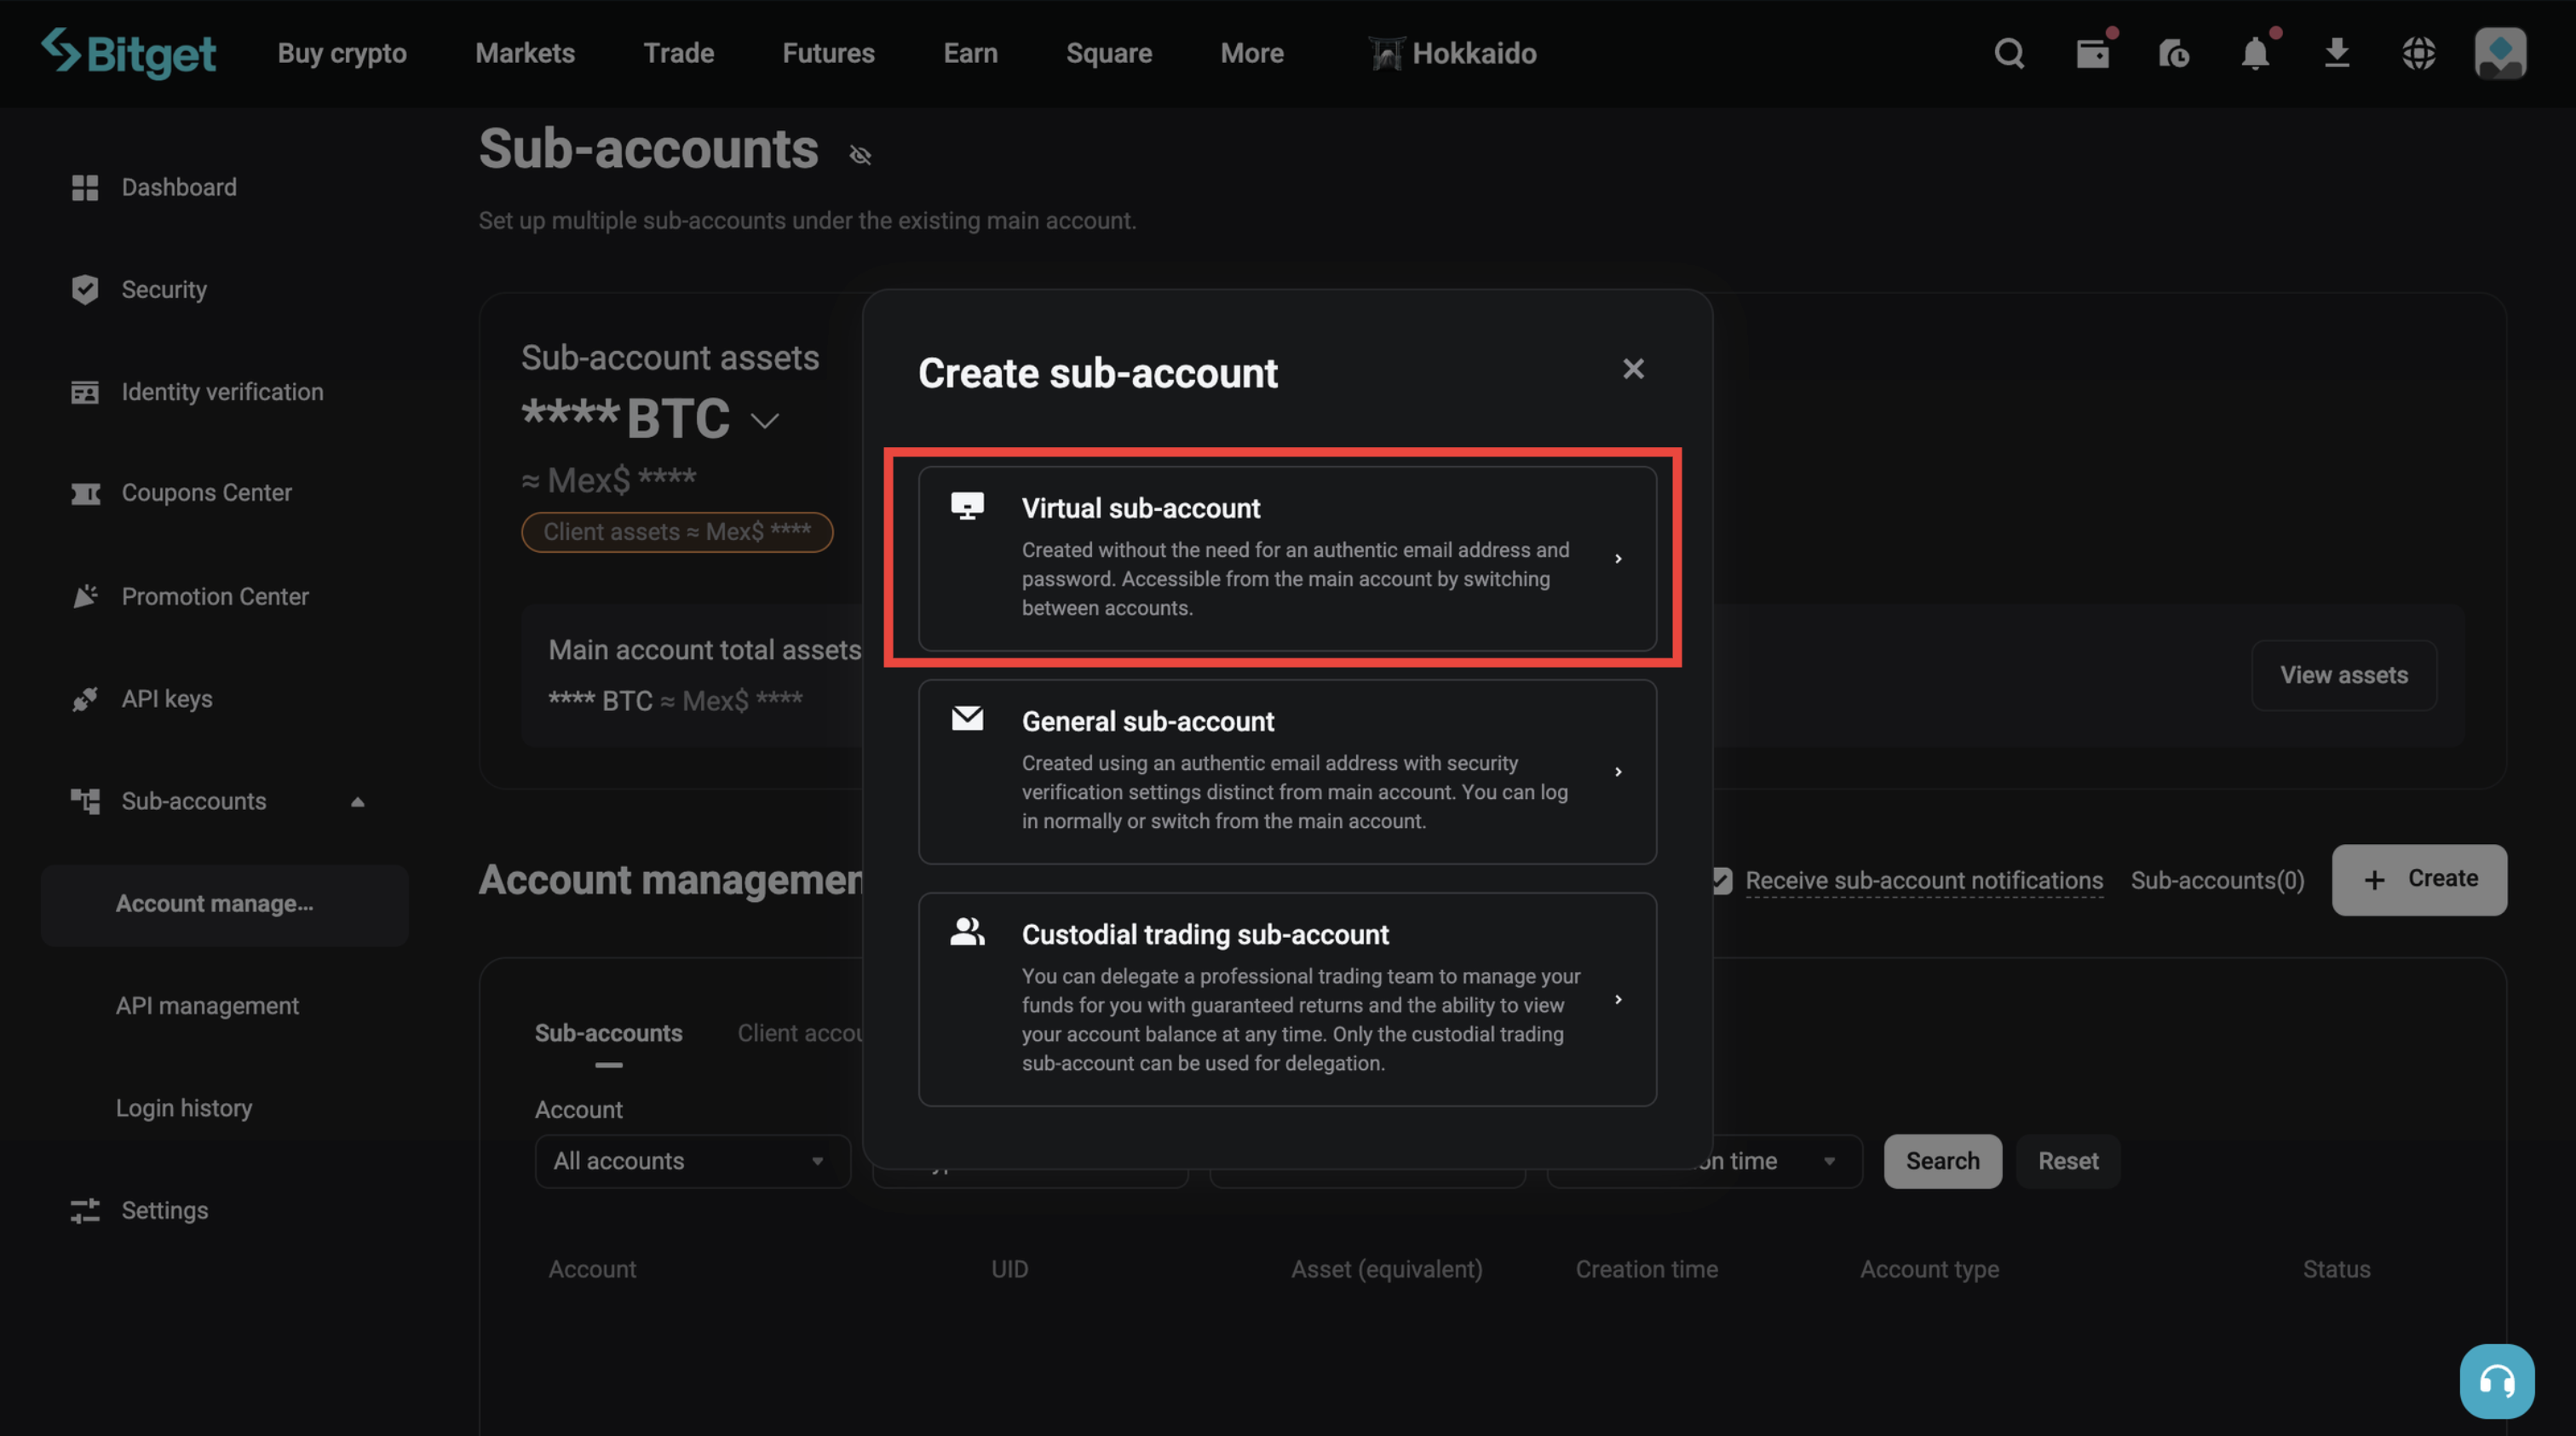
- Select Virtual sub-account — this is the recommended option for connecting via API: it doesn't need separate login credentials and inherits your main account's KYC verification.
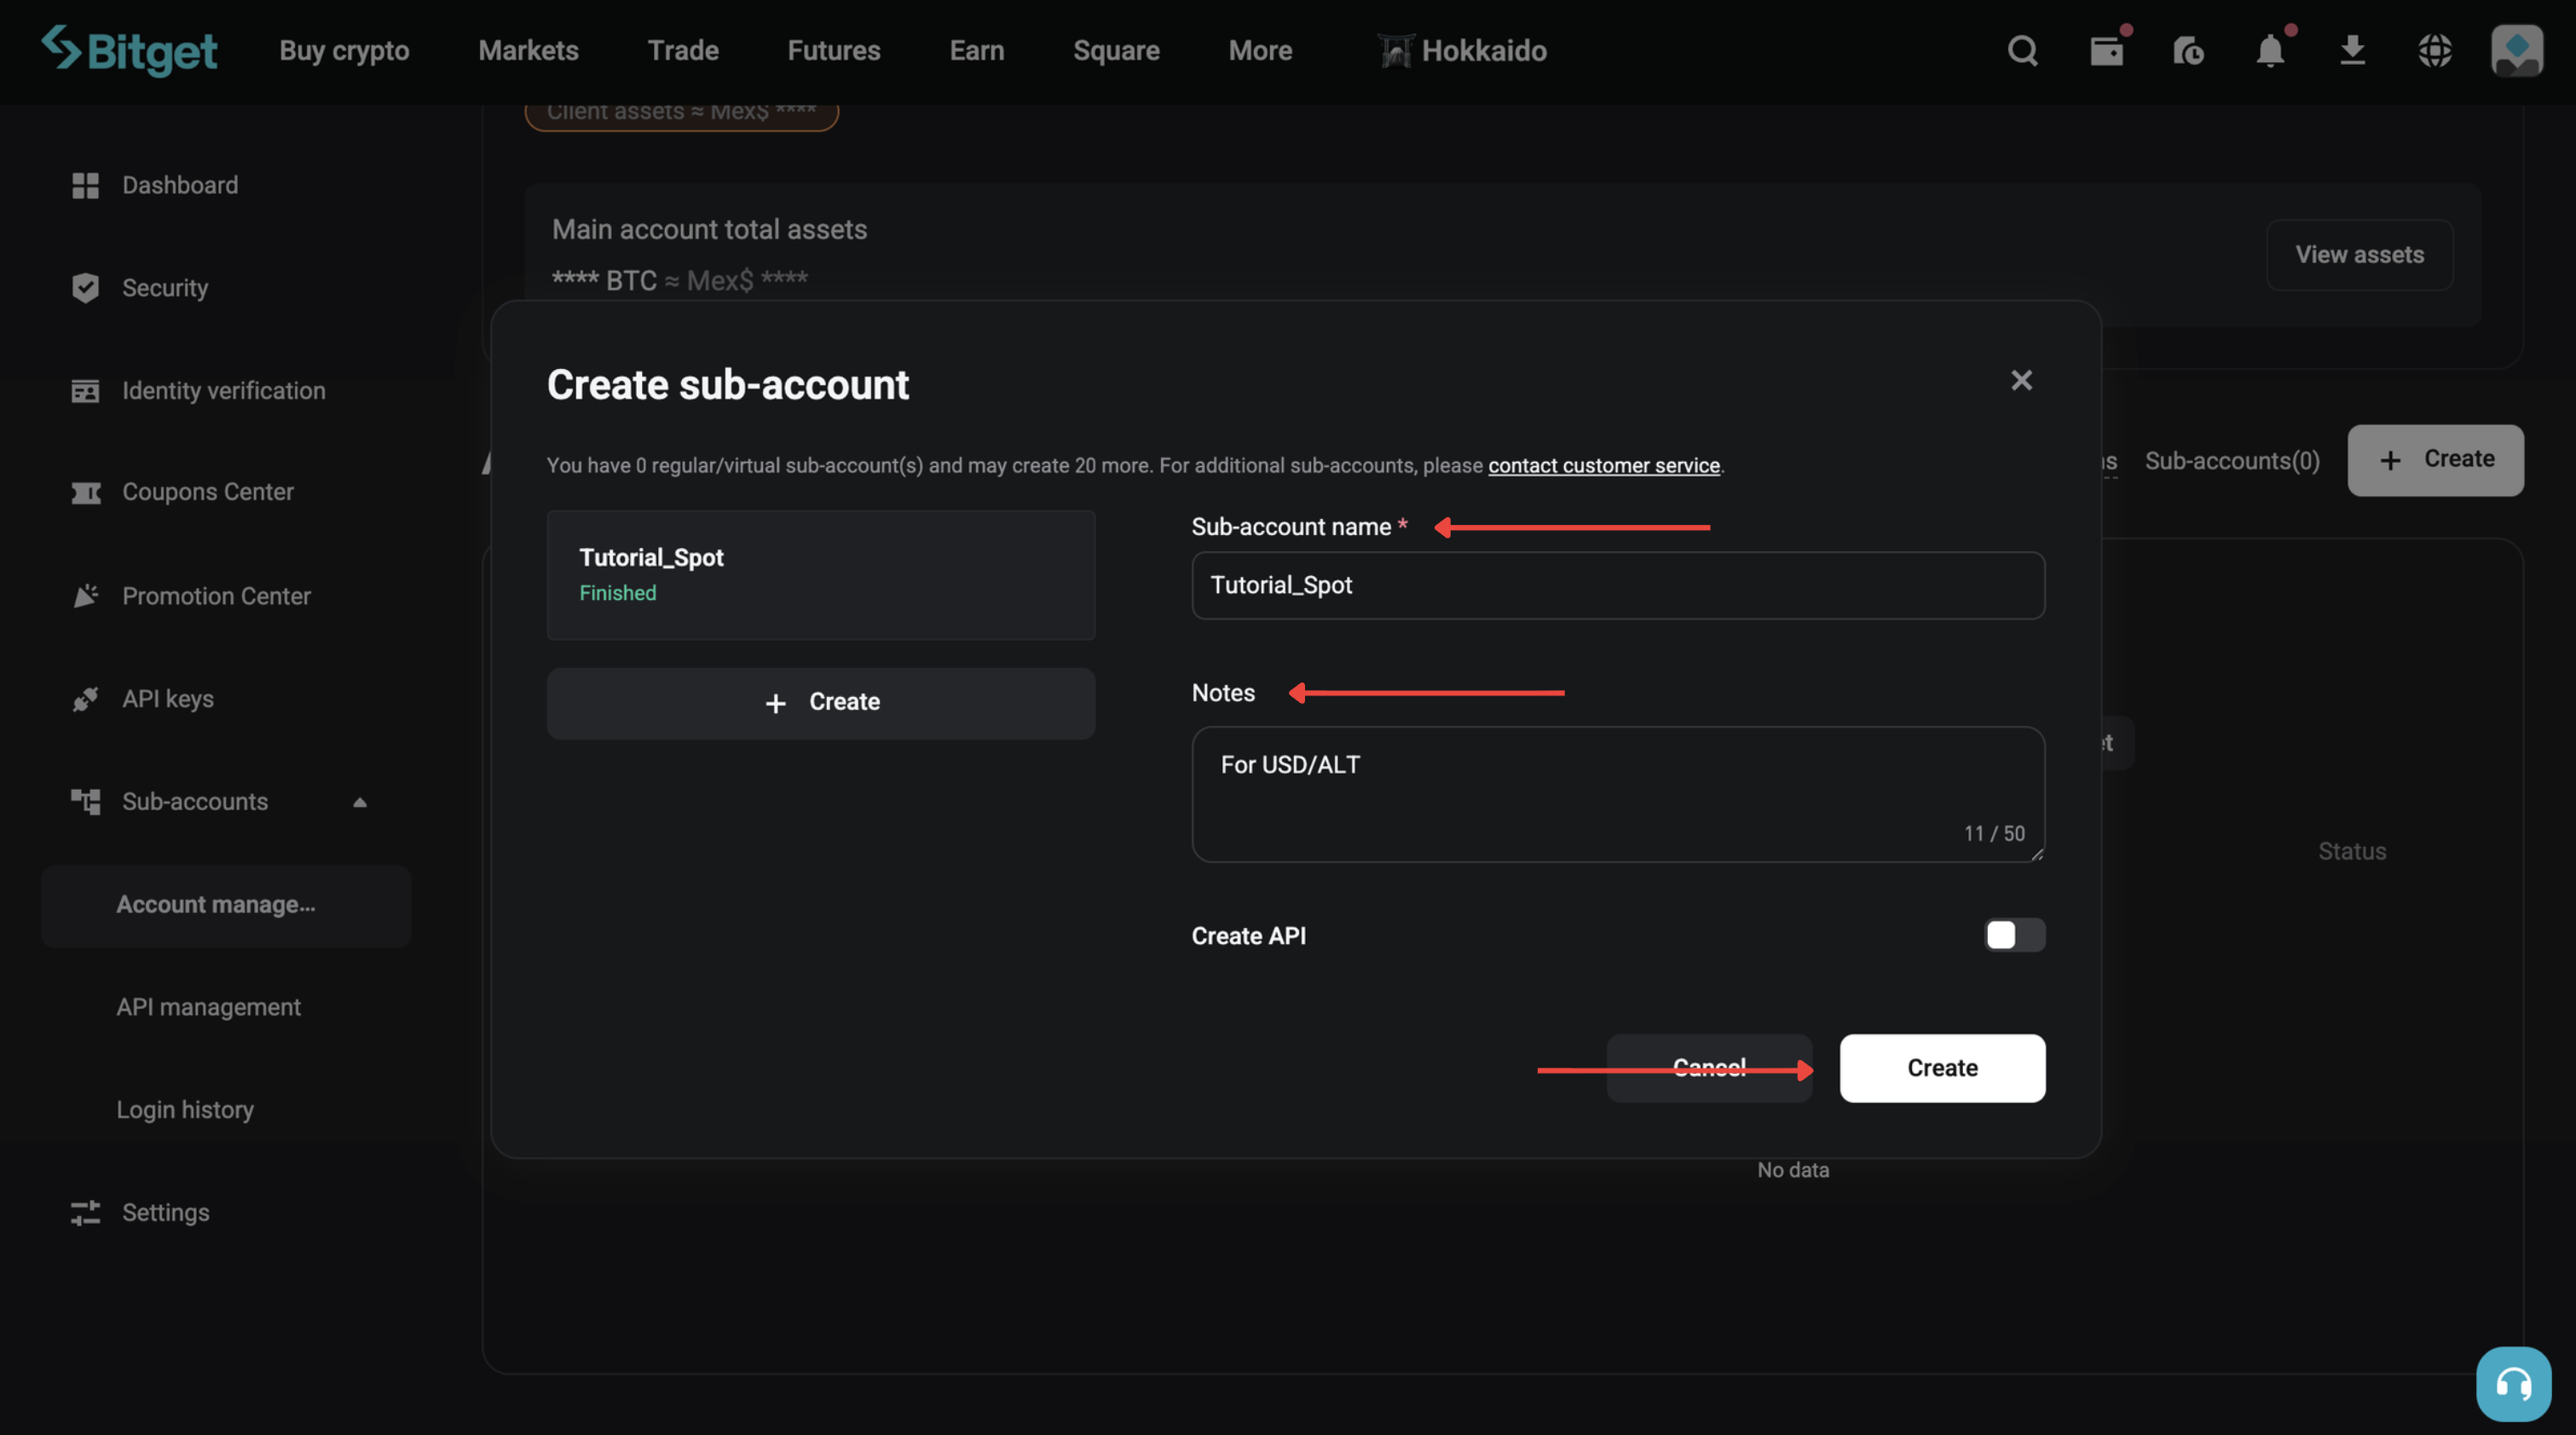
- Name your sub-account (in the Notes field you can add a short description to keep your accounts organized), click Create, and complete the security verification (email, Passkey, Google Authenticator, or SMS).
Step 2 — Transfer funds
Your account needs to hold the minimum balance before you connect it — at least $30,000 USDT or USDC for Alpha 1x, or 0.4 BTC or $30,000 USDT or USDC for Alpha 2x. If the funds aren't there, connecting will fail with an "Insufficient Funds" error.
Bitget transfers between your main account and sub-accounts are instant and free:
- Click your profile icon, then Sub-accounts, and open Sub-account management.
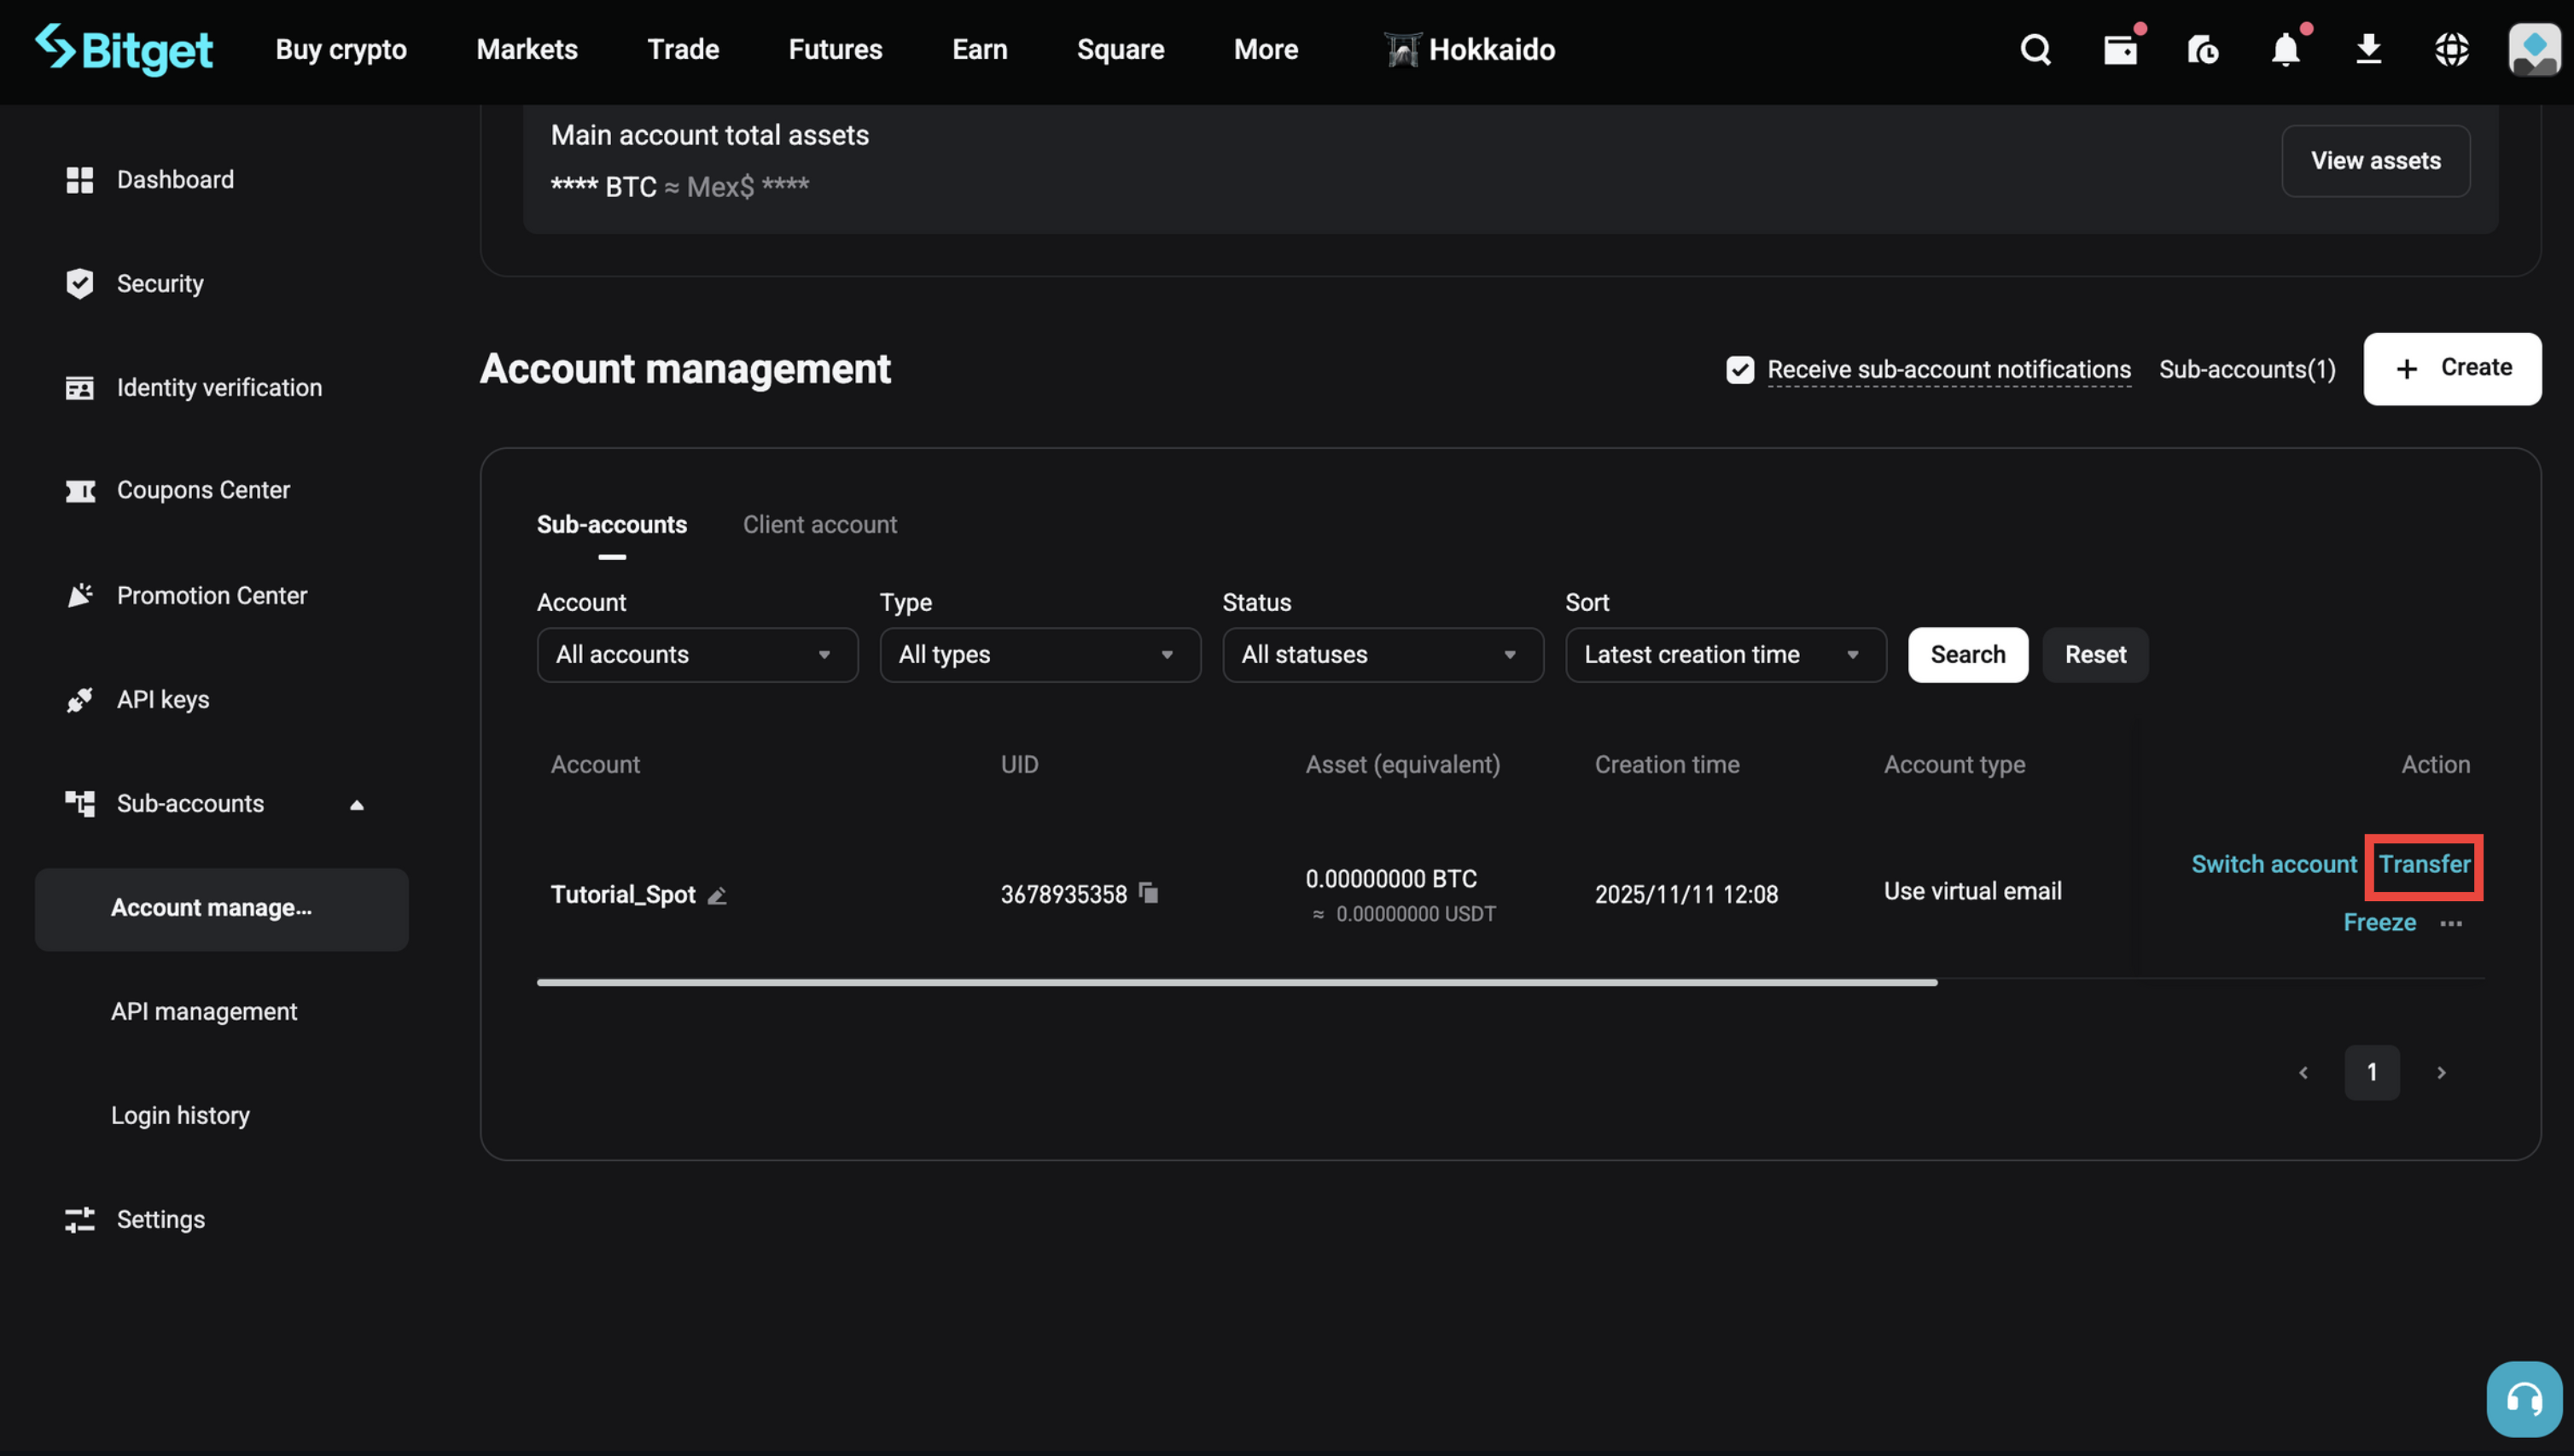
- In the sub-account list, select your new sub-account and click Transfer.
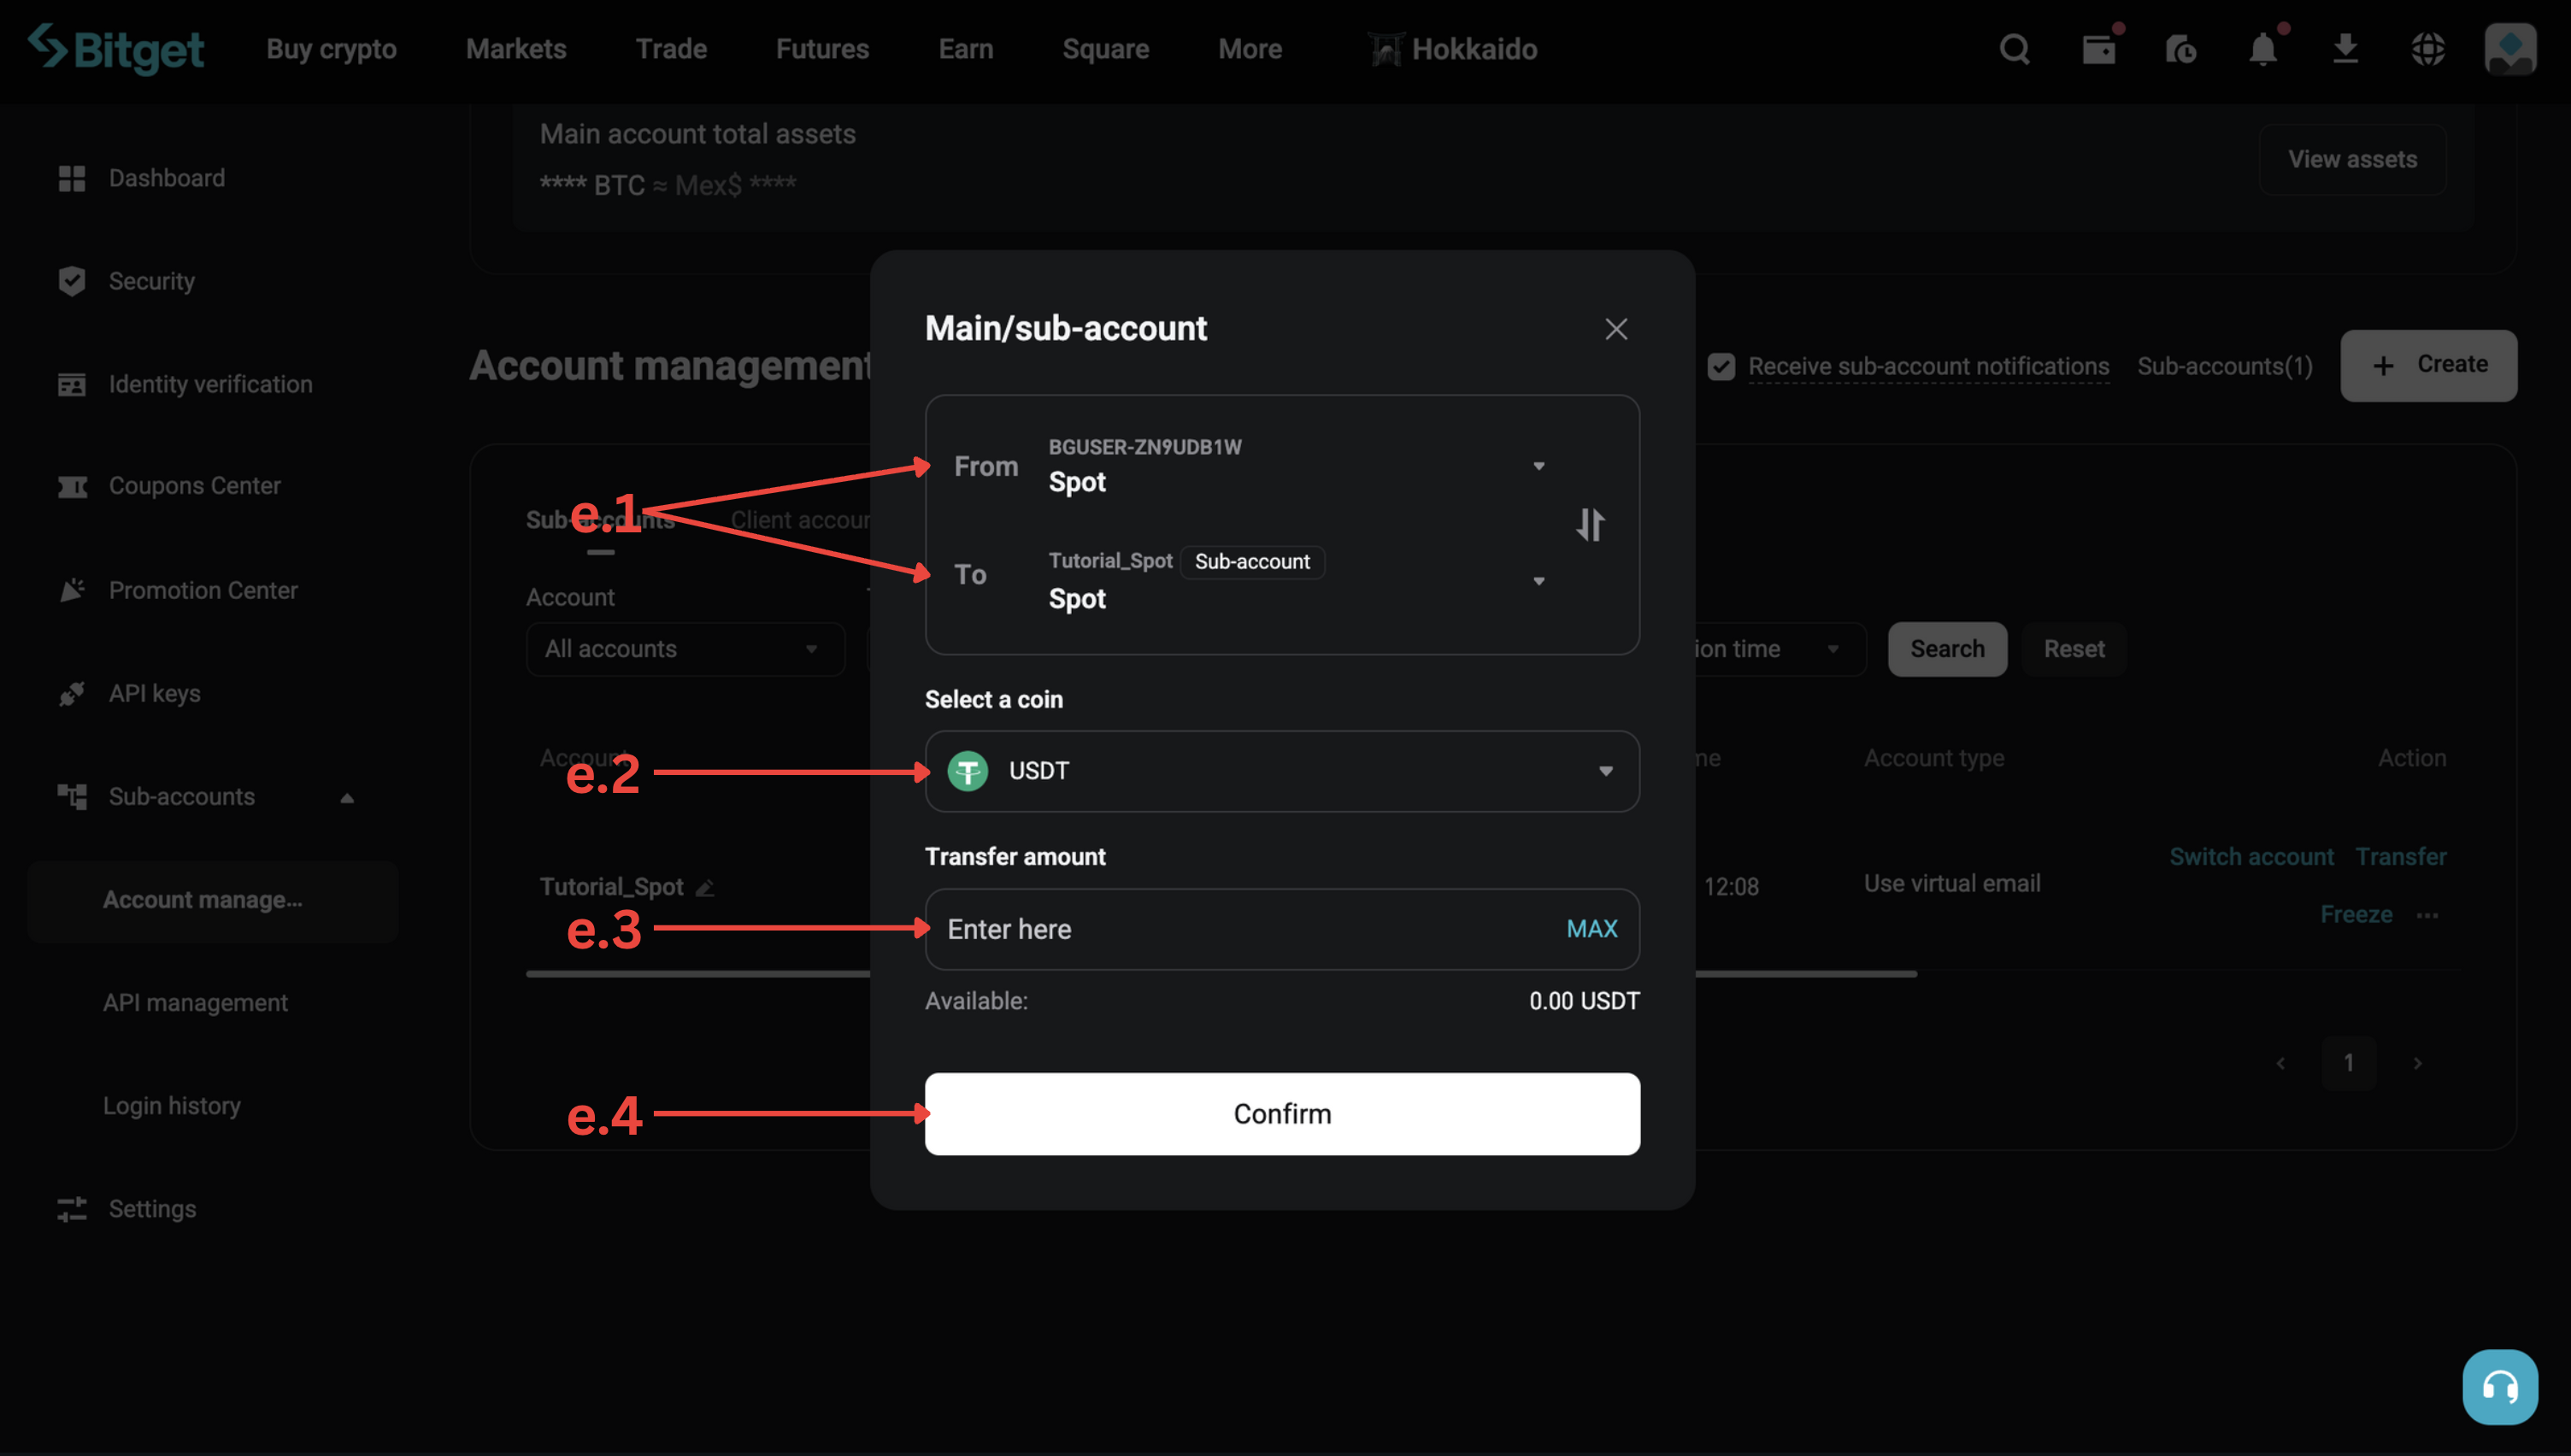
- Set the transfer direction: from main account to your sub-account.
- Select the asset and enter the amount in your base trading asset — the asset you want to accumulate.
- Review the details and click Confirm. The funds arrive instantly.
What's next
Your account is ready. Continue with the setup guide to connect it to Alpha Pro: How to get started and set up Alpha Pro.